
In this article, you will learn all about how to calibrate projector. And the reasons why we need to calibrate our projector in detail. If your experience is dull, the colors are distorted, and the focus is fuzzy. Who’s at fault? An important but sometimes disregarded stage is accurate projector calibration.
The good news is that this article shows you how to turn everyday presentations, movie nights, art installations, and more into amazing ones by calibrating your projector.
Let’s start with the fundamentals and get right to the point of this process.
Table of Contents
How to Calibrate Projector | Step-by-step Guide
Step 1: Initial Setup Environment
Make sure the illumination in the room matches the usual viewing circumstances before beginning. Check that you adjust in the dark before watching a movie. Your calibration setting should be under ambient lights when giving presentations.
Positioning: To avoid geometric distortions, the projector should be positioned such that it is perpendicular to the screen and not tilted.
Step 2: Setting the Aspect Ratio
The width to height ratio of an image is known as its aspect ratio. Aspect ratios like 4:3, 16:9, and 21:9 are frequently used. Select the one that most closely matches your content and screen. Your viewing experience may be impacted by stretched or compressed pictures caused by incorrect aspect ratios.
Step 3: Alignment and Geometry
This is the step to concentrate on if you’re thinking, “How do I adjust projector to fit screen?” Alignment adjustments can be done to make sure the image fits exactly on the screen and is distortion-free once the correct aspect ratio is established.
Step 4: Sharpness and Focus
Fine Details:
Project a picture with text or fine details. Once the details are clear and distinct, adjust the focus ring on the projector.
Sharpness:
Verify the sharpness configuration. Make sure the brightness is adjusted to highlight details without adding fake edges or “halos” around items.
Step 5: Contrast and Brightness
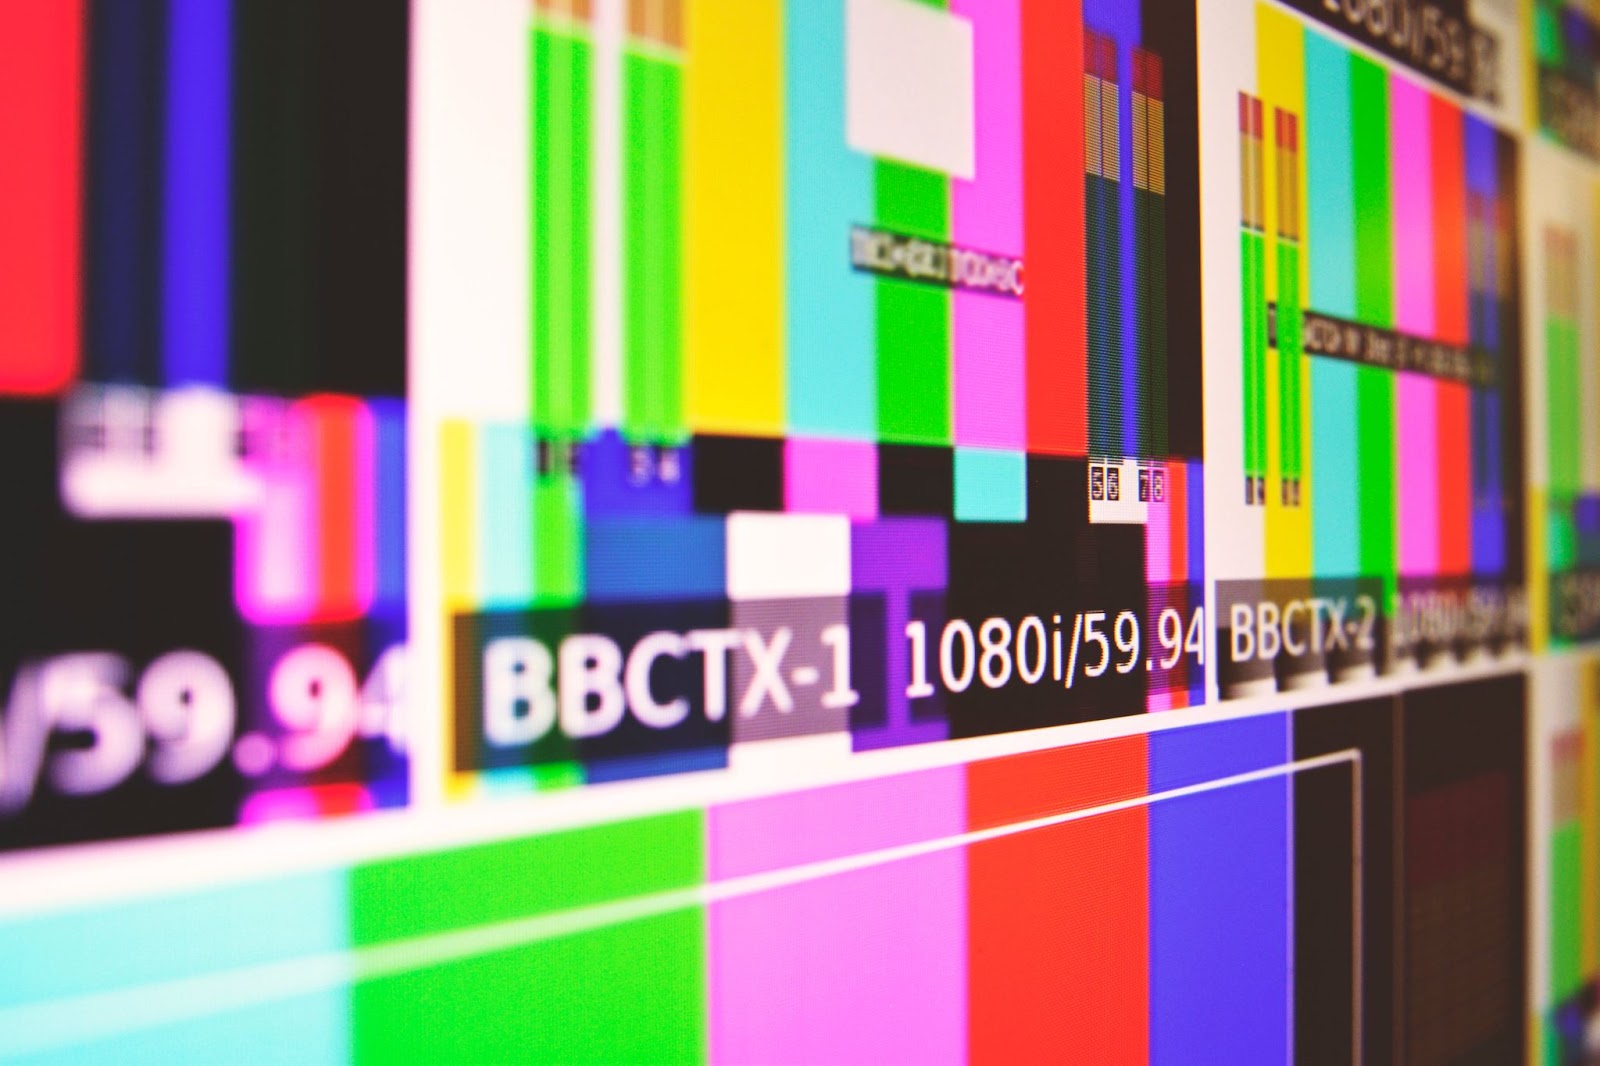
Test Patterns:
To display patterns specifically for brightness and contrast, use a calibration disc, video, a pattern generator, or the built-in capability.
Adjustment:
Verify that the blacks are deep without sacrificing shadow detail, and that the whites are crisp without seeming unduly bright.
Step 6: Adjusting Colors
Use of Colorimeter:
Use a colorimeter in combine form with calibration software to achieve accurate color calibration of projectors.
Hand Tweaking:
Show a pattern of colors, then play around with the saturation, tint, and color temperature until the colors on the screen resemble your reference or seem natural.
Step 7: Check for Uniformity
Single Color Display:
Fill the screen with a single, consistent color, such as gray or white.
Observation:
Seek out any discernible changes in hue or brightness. If there are discrepancies, it could be because of abnormalities with the projector or screen.
Step 8: Remember the Adjusted Configurations
Saving Profiles:
Select the projector’s menu and save the configurations after calibrating. You can store numerous profiles with a lot of projectors. If you like different calibrations for games, movies, or presentations, this is helpful.
Frequent Inspections:
Recall that recalibration may be required over time when bulbs deteriorate and other factors become relevant. To guarantee the optimal viewing experience, often compare your existing settings with new calibrations.
Why is Projector Calibration Important?
1. Image Quality:
This is the most evident factor. You want the greatest possible visuals for your games, movies, and presentations. An incorrectly calibrated projector can cause color distortion, detail blurring, and degradation of the overall viewing experience. The calibration process ensures that the image you see on the screen is as accurate as possible.
2. Consistency Across Devices:
You intend to upgrade or have several projectors. Across all devices, calibration guarantees a uniform image quality. This is particularly important in work environments where presentations must appear their best.
3. Lifespan:
A properly adjusted projector has a longer lifespan. The projector needs to work less when brightness and contrast are maximized, which lessens hardware wear and tear.
4. Personalized Experience:
Color balance, brightness, and contrast are personal preferences for each person. Using calibration, you may customize the viewing experience to your own preferences instead of relying on default settings meant for the ‘average’ user.
5. Enhanced Functionality:
A number of features, including 3D capability, different aspect ratios, and even interactive elements, are included with modern projectors. By tailoring these capabilities to your particular use case, calibration makes sure you’re getting the most out of them.
6. Ideal Viewing in Various Environments:
The appearance of a picture can be significantly impacted by variations in lights. You can fine-tune the settings for different lighting conditions with calibration, so you can see your best in a brightly lit conference room or a dark home theater.
How do I get the Best Picture on my Projector?
The projector should first be positioned at an appropriate distance from the screen to produce the best picture. To optimise contrast, make sure the space is sufficiently black.
In addition, you have to make some settings for brightness, contrast, and colour balance using the projector’s built-in settings. You can also enhance Picture quality by using modern software and high-quality wires. If you find any complex changes in your projector, think about hiring a calibration specialist.
When Should You Calibrate a Projector?
When you first start setting your projector, please make sure it is calibrated for the best results and performance. So, we recommended that you do an additional calibration by following significant modifications, which include relocating the projector or changing the light.
However, You have to keep in mind that you are doing proper maintenance approximately every half a year, which may also require recalibration. The process of calibration improves your viewing experience by guaranteeing precise colour reproduction and crisp focus.
Frequently Asked Questions
Q1. Should I calibrate my Projector?
If this is your first time using the projector, you need to adjust its calibration. Observe the picture if you haven’t used your projector in a few days to a few weeks. There’s no need to perform another calibration if you’re happy with the clarity, colour, and settings.
Q2. What are the best resolution settings for a projector?
For budget-friendly movie projection, 720p (1280×720 pixels, 16:9 aspect ratio) is the most often utilised format. It conforms to the HDTV standard in 720p. 1080p: Nowadays, the industry standard for home theater is 1080×1080 pixels with a 16:9 aspect ratio.
Q3. How Much does it cost to Calibrate a Projector?
If you calibrate the projector manually, there is no expense required. Although there is practically no reason to, you can certainly engage AV pros to handle everything for you. Even if you have calibrated the projector before, you must do it again.
Conclusion
In conclusion, how to calibrate projector is obvious that projector calibration is an important task. It’s the distinction between an image that fades from memory and one that stays with you long after the screen darkens. Calibration may help you become a visual master, whether you’re getting ready for a crucial business presentation or a family movie night. Don’t allow your investment go to waste by ignoring these crucial guidelines and recommendations.